The only one available locally was a demo unit with a yellow grip. I personally don’t like that shade of yellow and wouldn’t feel right using it in professional situations, but the deal was good and I couldn’t pass it up. I was able to acquire one of those fake K-01 display models to use as parts.
 |
If you haven’t seen them before, they are empty shells that are used to give people an idea of each style of the camera. It’s an efficient way for Pentax to get something into local stores for people to handle. If you want to do something similar to what I did, you are on your own in finding one of those fake cameras. Sorry, I can’t help you find one.
 |
When in doubt, contact Pentax and see if they sell the grip sections for the K-01. I tried that, but didn’t have much luck. CRIS support was a bit better and referred me to a parts department, but they didn’t even have the parts listing document or know what a K-01 was! (they did have a document for the K-7 they sent me after asking about a rear scroll wheel replacement)
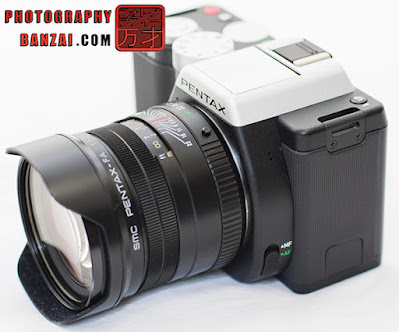
You can see the real camera on the left and the fake on the right. The interesting thing is that they use many of the same components.
Let’s get started with the process!
 |
First off I disassembled the fake camera so I could understand how things were constructed.
The front grip pieces are simply attached to the camera by some super sticky double sided tape. You need to remove the bottom panel of the camera to easily get at them. The two port access panels are the more challenging items to remove. You need to remove the screws from both sides of the camera after removing the front grip sections. Seeing as this was a fake camera, I went all the way and fully disassembled it, but if you were taking the grip off of a real camera you could just loosen the front and back plastic panels to make it easier.
To extract the rubber memory card door you need to try and separate the two body panels and pull up on the center connecting piece to give the rubber enough room to be pulled out. Just be sure not to pull up too hard on the center plastic body panel piece because I think that has the potential of snapping off (however, this body panel plastic seems to have a good level of strength and flexibility). For the rubber MIC port cover, you can just pull on it until the metal ring that is compressed onto it slides off or you can completely disassemble the fake camera to get at it with needle nose pliers.
 |
That photo above is the real camera as I’m replacing the grip. In this case I wanted to do as little as possible. All that needs to be done is to remove the bottom panel and the screws on each side (don’t forget the strap lugs!).
 |
The port and memory card panels are again the most difficult part. This time the MIC port took a bit more thought. I pulled out the yellow port cover and let the metal ring fall out of the camera. For the replacement black port cover, I was able to clamp the metal ring back on and slide it horizontally into the real camera’s hole. as long as you clamp the ring so it is long and thin it should fit through the hole with a bit of effort, kind of like pushing a spear with a thick rope attached through a hole. The memory card door was the same process as the fake camera. Again, don’t put too much upward force on the center plastic piece.
Here is the real K-01 with a black black. I personally think it looks a lot better…
 |
 |
To make my camera a bit unique, I used the black strap lugs from the fake white camera instead of the original silver ones. So, you might be wondering, is it possible to make a completely black camera with a real camera and a fake white demo unit? I think it might be. The challenge is that the top metal flash port is secured from inside and the center flash port is very securely attached. I slightly bent and scuffed up mine a bit trying to pry off the center flash piece.
I think it would require that the plastic body panel underneath be sacrificed to release the top components. Without being able to see inside, it’s difficult to say how to do that in a way the components don’t get damaged. Another big challenge is that it would require that the real camera be disassembled significantly more to replace those components.
For some laughs, I put the fake camera back together with the yellow grip and silver strap lugs:
 |
As you can see I decided to call it the “K-RAZY-01” camera. It’s something else, isn’t it? haha
日本からの訪問者の流入を見ました。。。笑。
私が答えることを望んだが、2CH.NETはアクセス制限があるでしょう。。。
ごめん、サイトは英語だけでした。 日本語が少し分かります。
K-01のグリップの変更は難しくない、けどすべての黒のカメラはたぶんとても大変と思います。
偽のカメラのフラッシュコンパートメントは取り除きにくいでした。 目に見えるネジません。
今はK-01がありません、けど良いカメラでした。すてきなセンサーがありますし。