
I like trying to slowly improve on how I work. In the software industry it’s called iterative development. The same ideas can be applied to video production. In this case, over 9 years of making YouTube videos I’ve usually had to setup a camera and take it down for any recording I did at home. That takes a good deal of time that could be avoided with a dedicated recording setup. The constant slight changes also introduced unwanted variability to the result.
Basically, I’m referring to the type of videos where I’m talking to the camera or recording some type of mixture of content where a lot of it will be voiceover, but I still want my face in the video sometimes.
While I can’t totally dedicate a camera to this type of recording, I can often have one of my Canon EOS M50 bodies for that task. There isn’t too often when I need all three camera bodies at once, or the two M50 bodies instead of the M5 plus one M50.
It’s part of the reason you now see me use the M5 as my stills camera a lot more than one of the M50 bodies, besides preferring that camera for taking photos. Now I have to take down the second M50 to make a video about it because I use the other one for mobile video recording. The M5 could do the job, but it has drawbacks like the screen that can’t face the lens.
I started slow with this idea and have been trying to improve on it little by little. My latest addition got the filming setup to a level that I wanted to show it here. I switched out a small tripod I was using for a 11″ Neewer “magic arm” attached to a nearby shelf. It freed up space on the floor and makes it a little safer to walk around this cramped space. It also can be positioned higher than the tripod with how tall the shelf is.
This setup consists of various parts. I’ll go over each one…
You need a camera to record yourself. There are various ways to go about this depending on the camera’s capabilities. A big consideration is how good the given camera is with video autofocus. Can you trust it? If you can’t or prefer manual focus, there are ways to make it work such as using the camera maker’s WIFI app to make a focus selection before recording. Years back, I had huge focus difficulties when I was using Pentax and Nikon DSLRs in my videos whenever I was trying to record myself. I didn’t have any luxury like focus peaking or using an app to remotely check focus. Thinking back I probably could have set up some type of LCD monitor with HDMI out, but I don’t know how much that would have helped. Often, I set up some sort of analog for myself and pre-focused on it. That technique didn’t work especially well and with my lackluster lighting I would use apertures too large, which compounded the issues of manual focus.
The Camera
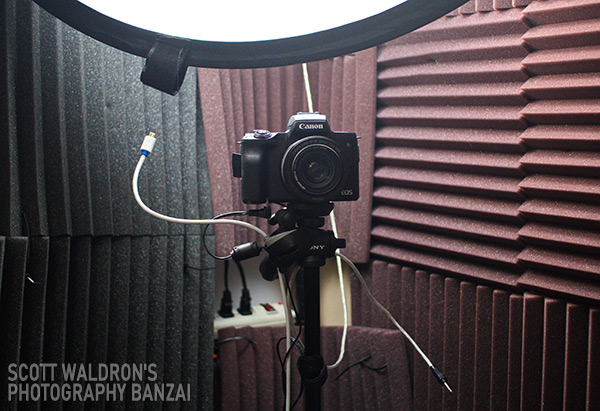
All of my focusing problems changed abruptly when I decided to pick up a Canon Rebel SL2. All of the videos I saw on the camera said the video autofocus was good, and they were right. It was a massive game changer for me with video. I used that for a while as my video camera. It worked so well I thought about a full switch from the full-frame Nikon DSLRs I had at the time to Canon dual-pixel AF cameras, but thought it was a waste using DSLRs at that point. Mirrorless appeared to make a lot more sense for what I do. I decided to go with a pair of Canon EOS M50 bodies. I ended up selling the SL2, a Fujifilm X100F I had, and eventually the Nikon cameras. For what I do, having two camera bodies is a bare minimum. Eventually I picked up a Canon EOS M100 that acted as a b-roll camera and small photo camera, but it has some drawbacks, like no microphone jack. I eventually got a used Canon EOS M5 as my photo camera, freeing up one of the M50 bodies a bit.
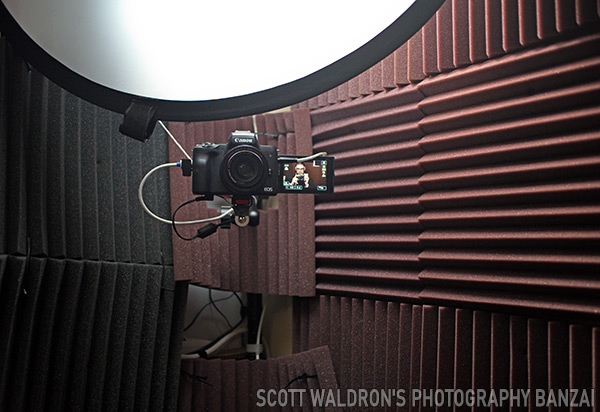
The M50 is sufficient for recording that I do. It has a fully articulating screen so I can make sure framing is correct without having to resort to the app. Though, in the case of the M50, Canon’s “Camera Connect” app is well featured and I’ve used it quite a bit for videos like this before making a dedicated setup. It has the microphone port for ease of recording decent quality audio. It has the touch screen that works with on-screen setting adjustments. The video autofocus is great. The price now is good as well.
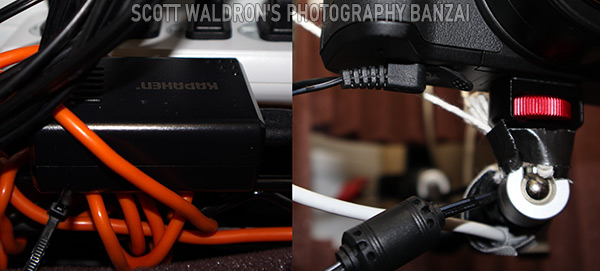
I use an AC adapter with a DC coupler (replaces the battery) in the M50 so I can avoid needing to charge batteries constantly. The issue is that the memory card is in the same area as the battery. So before this setup I’d often have to disconnect the AC adapter. I experimented with the WIFI transfer capability of the M50, but it was much much too slow to be a feasible solution. I settled on using a long USB cable from the computer to the M50 along with Canon’s EOS Utility, (part of their Digital Photo Professional software, to directly transfer the video footage from the camera to the computer. Before using Canon’s software I was trying to transfer video files with Windows file explorer, but I quickly found out that any file over 4 gigabytes wouldn’t transfer. Thankfully with a little help from Canon’s support, I tried their dedicated software and it works with those large files. Even if you don’t hit the 30 minute limit, the files will occasionally go past 4 gigabytes. Another thing to take note of is that if the M50 is splitting your video into multiple small files, use a 64gb or larger memory card with it. I think it’s… exFAT instead of FAT32 formatted that matters. That allows the camera to make one large file, which I personally prefer. I use a 64GB card in the camera. After a few recording sessions I clear it out. There are drawbacks like the 30 minute recording limit on the camera. I occasionally hit that limit. Cameras such as the Sony A6400 don’t have the recording limit. Maybe eventually I can transition to something like that.
The Main Space
Do you have a dedicated space for a desktop or laptop computer? If you’ve put a good deal of time into any type of computer work, chances are you do. In my case I have an area with a full desktop computer area. The computer is on a wire shelf, there is a desk with dual screens, and a few other things like external hard drives for backup. There isn’t a ton of space, but enough kitty corner to the computer that I was able to situate some type of recording setup. It started off with a big tripod and a lightstand plus a double fixture light and diffusion umbrella. I could leave that stuff around, but it took up a lot of room and was a hazard due to how much space it took up.
Something To Build On
The first version of my current setup took it further. I was able to rearrange things in the room overall so a large metal shelf unit took up the spot where I had the camera and lightstand. That gave me a sturdy tall platform to mount things to.
I took all of the metal clamp lights I had bought over the years and mounted them to the shelf. I don’t have any large lighting dedicated to videography. All of that has never been within my nonexistent budget. Anyways, that gave me 800 lumens times 6 lights of daylight color temperature light. I measured with a Kill-a-watt meter of under 65 watts total power use.
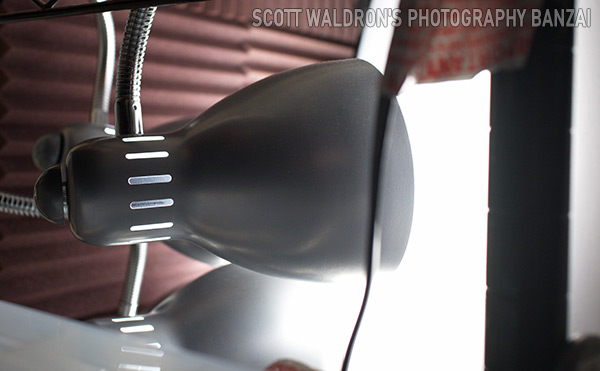
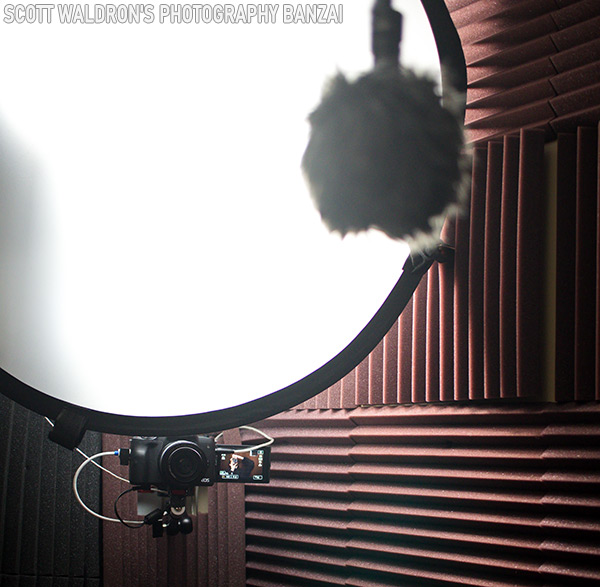
In front of that I used the inner diffusion portion of a 5-n-1 reflector I rarely used. At around a 45 degree angle it creates a space for the clamp lights between the shelf and wall that the shelf is up against. While the diffusion isn’t perfectly parallel to where I sit, it’s good enough and adds some absolutely necessary softening of the light from those basic light bulbs. I attached additional cloth loops to the diffusion panel so it can attach to the shelf and the wall. It’s out of the way and does the intended job well enough. One potential drawback is that even just tapping it makes some noise like a musical drum, so my voice might reflect on the panel a bit.
Audio Is Important
For audio I actually had this setup for considerably longer. I was using a light stand with a boom arm I had purchased back in December 2017. At one point I got an idea to see if I could somehow attach the boom arm to the big metal shelf instead of having a lightstand taking up floor space. It turns out the lightstand I least liked to use was a great option to partly disassemble and fit into one of the columns of the shelf. These shelve units use solid wire shelves with the main structural columns comprised of thick tubes. The tubes are completely hollow and have plastic end caps at the top.
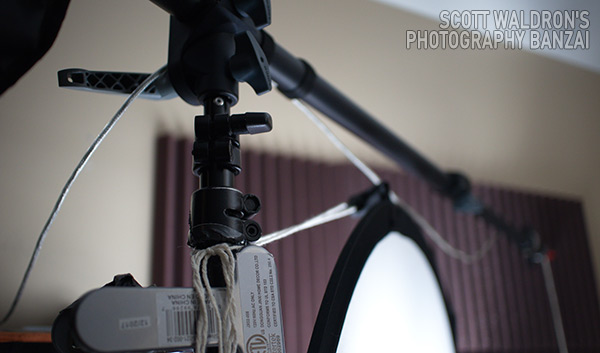
I was able to fit the top few sections of the lightstand into a column tube of the shelf snugly. All it took was some padding material, tape, and adjustment. It works perfectly and the upper few sections of the lightstand act as a smooth pivot point for the boom arm.
An important aspect of audio is microphone placement. You want to get it as close to the subject as possible while keeping it out of the frame. Though, there is nothing wrong with having the microphone in the frame if you prefer that. Some people like to have the microphone placed on the floor with a stand of some sort, but I prefer top-down because there is less chance of floor vibration being transmitted to the microphone. In my case I run the mic down from the boom arm on a long shielded audio cable. Again, with the lack of a budget, I record audio into the camera. I could use a Zoom H1 recorder that I have, but there are time consuming drawbacks related to audio syncing.
Ideas For The Future
Get one or two flexible LED light panels I can replace my clamp light setup with. I’m not totally sure this would work okay, but it might smooth things out.
Get a different microphone setup. The Rode VideoMic NTG looks interesting because it can do a safety track with the stereo output. Not sure what might work best here. Or a Zoom F6 recorder with the higher quality microphone.
Improve on acoustics. Reverb is an issue. Anything helps and these cheap foam panels at least do something, but there are still issues.
The most important wish-list item of all: Be able to afford a space dedicated to video production… lol. I can dream.
Summary
The point here is to consider making a dedicated recording setup or two. At times, I’ve had one dedicated to filming gear close up. They help out for sure. Take small steps toward the goal. You can always revise and improve over time. Anything you don’t have to completely tear down after every recording session is a big plus!