
I’ve been branching out into creating review videos of various products to see if it makes my overall work viable. Right now the videos are focused on Amazon’s video creator hub (my storefront) but I also upload to YouTube.
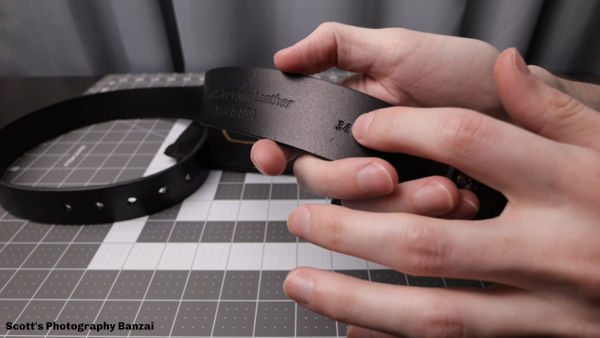
The company Vera Forma sent me a men’s belt to make a video on. In turn I wanted to produce decent quality product photographs to use for video thumbnails.
While out with friends I started looking for something to spice up the photos.
The Vera Forma Navigator belt video: https://youtu.be/NoCBnvS26Ns
Or check it out directly on Amazon:
https://amzn.to/3JeoJOk
While at Lowe’s I had noticed 18 inch square vinyl flooring tiles. They were only around $1 to $3.50 per tile and you are able to purchase single tiles.
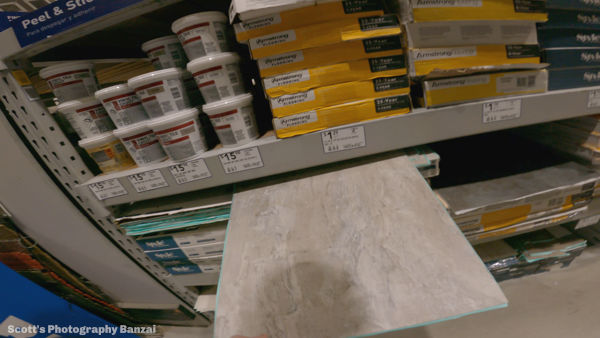
Here are the specific tiles I purchased. In the store you are able to buy single tiles instead of being required to buy the entire case.
Armstrong Flooring 18-in x 18-in Water Resistant Peel and Stick Vinyl Tile Flooring:
Style Selections 18-in x 18-in Groutable Water Resistant Peel and Stick Luxury Vinyl Tile Flooring:
It’s as simple as taking two of the tiles and joining them together because they have adhesive on one side. If the tiles are not perfectly aligned then you might want to consider using some type of glue around the edge of the two joined tiles to prevent adhesive from from getting on your fingers occasionally.
While these surfaces will improve the variety of photos, lighting is extremely important as well. I was using a Weeylite Ninja 400 and a large softbox with a Weeylite Ninja 20 reflecting light off of a white ceiling. I also used a Boling P1 light when I want to add color.


Doing actual photography with the surfaces was super easy. Maybe a bit larger would be better, but 18 inches feels large enough to get photos of moderately sized objects without issue.
A few drawbacks would be that the printing quality when using them up close isn’t perfect. The tiles, especially with two of them bonded together, is pretty heavy. Though not nearly as bad as a ceramic tile. So far I haven’t found a huge amount of variety in this tile size. Companies seem to be focused on mimicking stone rather than wood. It would be nice if there were more unique surface options.
A fun little photography project!
Video transcript:
Product Photography!
https://youtu.be/0igY_-_51GA
In this case a Vera Forma Navigator belt that this company had sent me to make a video on.
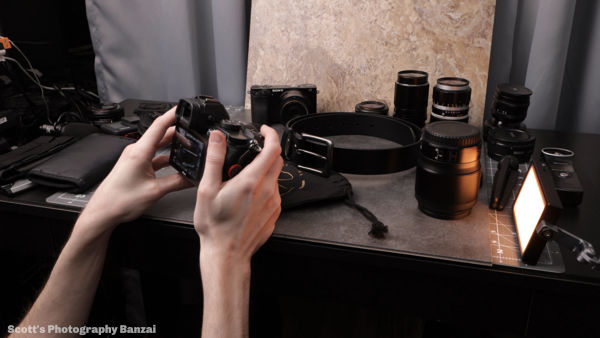
I also want to take some photos…
I was trying to think of ways to make it look more interesting.
I have a setup here, but it doesn’t look really fitting with this specific product.
Went to a few stores to look for some type of backdrop some type of surface to use.
I landed on Lowes, it’s one of the home improvement stores in the area.
I think it would be true for Home Depot and Menards as well, but specifically Lowe’s they have these 18 inch square vinyl flooring tiles.
They’re very low cost so picked up the four that they had available.
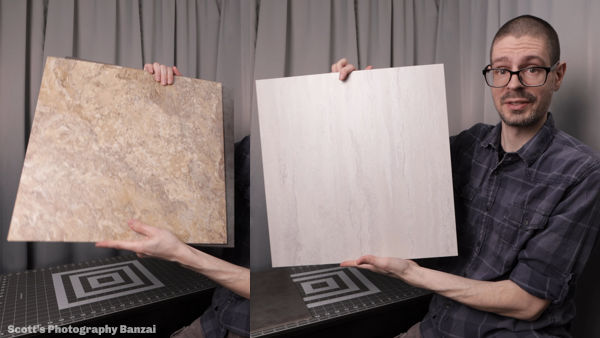
Goal is to sandwich two of them together and then I have two surfaces other two together another two surfaces to try to improve the photos.
This one here is kind of a marble look to it.
Not really sure if this will be strong enough to bond the two pieces together, but you can always use some type of glue.
In total under fifteen dollars for the four squares.
It’s a flooring thing and they didn’t have any fake wood ones at least at that specific store.
I think these two are a good combination for maybe a light background and the foreground a darker, so I’m not going to attach those together.
I don’t think I’ll be using these two together…
I’d have the two ready to go just need to align them that did increase their structural stability.
I think the adhesive is going to be fine.
I could always put an edge around this if I want to make it a little cleaner although when you’re photographing if you do put an edge it could show up in the background.
Might not be ideal you know if you don’t get it absolutely perfect there is a little bit of stickiness…
I do want to get this off otherwise it may make the surface a little uneven.
Two different additional surfaces.
These definitely have some weight to them, so keep that in mind.
You’ll notice when you try to pick them up at the store.
They do have some flex which is not great but I don’t think it’s enough to be an issue.
I have the 50 millimeter F/1.8s on the Nikon Z5 which will be for the photos.
In addition to the 28 millimeter F/2.8.
Might even try this AstrHori 50 millimeter tilt lens in addition to some colored light if I need it.
I’m thinking just a simple picture of the bag with the belt.
Top down type of thing.
I have the Weeylite Ninja 400 on the side at 70 power 5600 Kelvin color temperature and then I have another one just shooting up into the ceiling so it adds a bit of additional fill coming down…
All right here are the photos from that photo shoot.
It was pretty much like a speed run taking photos I really try to do it quick, I don’t know why!
Keep that in mind with the photos.
It’s just generally focusing on the idea of it rather than the execution of it.
I like the contrast of this object plus that specific background.
It’s a nice combination.
50 millimeter F/1.8s so I had a decent amount of room.
Stuff like this on the edge I can clip out if I need to.
So in this case you can see cropping works out okay.
Here I switched to one of the other backgrounds, definitely gives a different look which was the goal.
Have a bit of variety, mixture…
These are large enough that they do afford me a little bit of breathing room on the back.
Looks I’ve been editing a few of these.
Just going through them tried to change my angle get a different look.
A lot of options, again.. the surface looks relatively decent up close.
It does have some texturing from how it’s printed which isn’t ideal because you can tell at that point that it’s fake.
But I’d say when the picture is sized to whatever format you’re going to use it in I think it’ll work out okay most of the time.
But I wasn’t really feeling this specific surface.
Don’t think I took a ton of photos with it.
That one’s pretty good!
I could see using this one here.
Another top down again this one here you can see the reflection didn’t work out well.
I can definitely fix this one up to make it work, but in the background you can see I was running out of room at this specific angle and I got some of the other surface showing up.
It doesn’t look terrible, it’s just not ideal.
Same situation there’s a little bit of that other surface I could fix that or change it.
You know it’s it’s good to experiment and try different stuff.
Here I’m using the 28 millimeter F.2.8 so I can get decent amount closer and just get a different look to the photos.
It’s going to take more in which for this might not be ideal.
Yeah, more experimentation of trying to see what I can do with it.
These were not perfectly aligned when I sandwiched them together but I think some of them might have been slightly off too.
I can’t remember the name of that light right now but it’s RGB.
Tried to mimic this gold yellow but I didn’t really… I wasn’t able to perfectly dial it in.
Again, I can fix the distortions showing up with this specific lens.
Okay… not sure, oh.. this this one here is the AstrHori 50 millimeter tilt lens.
I didn’t use it too much, but you can see it’s a very unique option.
If I had used this a little bit more and experimented with it and just tried to get a better feel for what I could do with it definitely get some interesting stuff with this tilt lens.
Being a smaller subject it’s easier to cut out things you don’t want with a lens like that.
So you can see obviously the background’s much blurrier and then I moved back to the 50 F/1.8s.
At the very least you get an idea of the potential of different surfaces, especially lower cost options that you can by a bunch of them store them use them as needed.
The way that they produce different colors not necessarily the texture, but the texture helps a lot as well.
I think it works out because the gray slate here definitely is better than if I were using that other surf.. that cutting board surface that I have.
Here I was using I think a 17 millimeter close focus tube, because the 50 in this case isn’t super great for close focus.
There’s the Vera Forma Leatherworks logo on that.
It’s a nice belt if you want to check it out, I will have links in the description.
See if I can find one that’s actually in focus where I want it.
That’s a little bit better.
I would have liked.. I probably should use the smaller aperture. Of course you can do stacking as well.
Here are two actual edits that I was trying to make.
You got the Vera Forma logo, the belts in decent focus.. it’s not perfect but I think it worked and then the colored lighting and the slate surface on the bottom.
I like it, it’s a good mix!
I think I added a bunch of vignetting and stuff here to make it more moody.
That one turned out okay.
This one too as well the focus is off, still I think it’s good enough for a thumbnail image which is what I use for the video on this one.
Anyways, hope you get the idea, relatively low cost options at home improvement stores to use as surfaces.
Probably even props and other objects things you can do with your photos to get some interesting stuff out of it.
You know, try different things see what works.
Scott of Photography Banzai, thanks!