
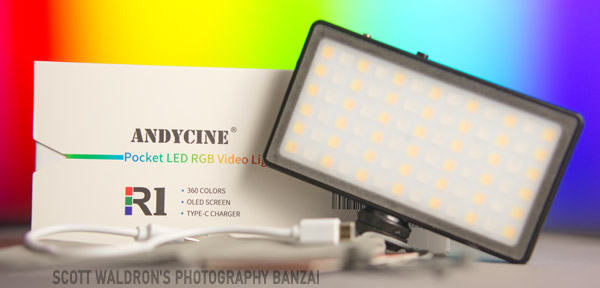
I had a generally positive experience with the Boling P1 light Andycine sent me previously, so when they contacted me about trying their completely in-house R1 light, I was on-board. The lights are similar in build and interface, but the R1 is lower cost with fewer features. Sometimes simplicity is the way to go.
Check out the light through my links:
Amazon: https://amzn.to/3h1WpNW
B&H: https://bhpho.to/38XGI7u
Or consider the Andycine Boling P1 (My Video):
Amazon: https://amzn.to/2BSQp7G
B&H: https://bhpho.to/32V6cP9
Official Specifications
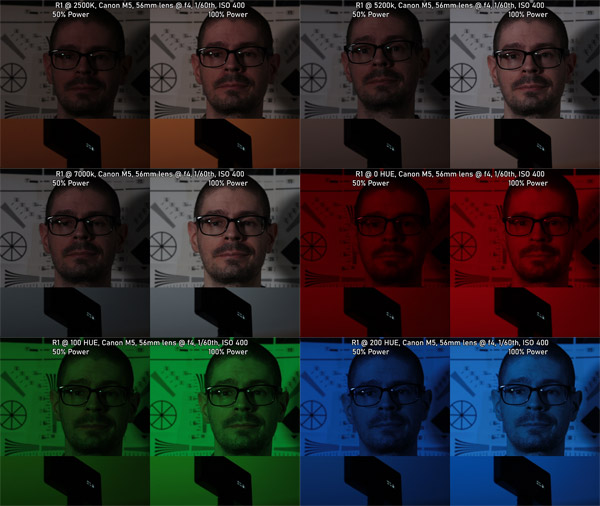
Color Temperature: 2500k-7000k
Color Accuracy: 97 CRI, 95 TLCI
Numbers of LEDs: 120
Integrated battery: 3600 mAh
Battery Chemistry: Lithium-ion polymer (LiPo)
Operating Voltage: 3.7 vdc
Maximum Power Consumption: 10w
Power Input Connector: Type-C USB 5 volt 2 amps
Battery Working Time: 2 hours (maximum brightness)
Battery Recharge Time: 3 hours (5v 2a)
Mount Type: 1/4″-20 female
Operating Temperature: 32 to 113°f / 0 to 45°c
Dimensions: 126x70x14.5mm
Weight: 200g
What’s the purpose of a light such as the R1?
It’s a multi-purpose light with bi-color, RGB, and effects in a compact size. The internal 3600 mAh battery makes it portable and long lasting. That combination of features means it can be used in a ton of situations.
What are a few R1 use cases?
- As an accent or background light. RGB is popular to use when adding a unique look or adding a hair light.
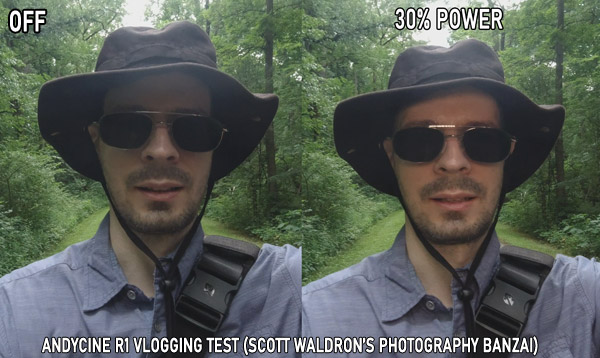
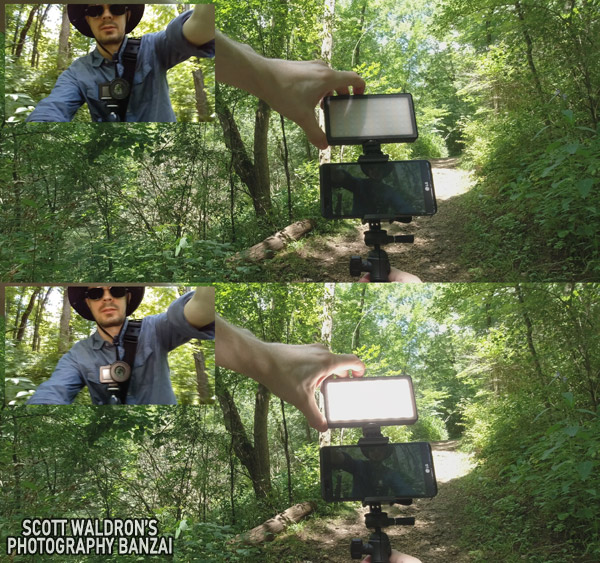
- For fill light when vlogging. The few tests I did in shaded paths of a park worked well. The only drawback was that mosquitoes seemed drawn to the light… and me, lol.
- Lighting smaller objects for product or macro photography. Given it’s a small light source by nature, you can directly light smaller objects without needing anything else. You could probably use diffusion with this light, but it’s going to cut into total output.
- Any situation where you need portable lighting. According to the official specification it should get 2 hours at 100% power. I haven’t had a situation where I’d need to verify this for myself, so keep that in mind.
- There are 7 effects modes. I haven’t yet had a need for these in my video work, but think along the lines of: lightning, incrementing through the RGB spectrum, and emergency vehicle effects.
The R1 or Boling P1?
- The P1 has more features such as the special bracket arm, saturation in RGB mode rather that just hue, and a dedicated power dial.
- The R1 has more battery capacity at 3600 mAh compared to 2930 mAh for the P1. That’s a good amount of extra power.
- The R1 has a simple 1/4th-20 mounting screw on the light. It’s placed in the most logical position on the bottom long side. For certain use cases I prefer that to the P1’s side arm.
- The R1 can go down to 10% power, whereas the P1 can technically drop to 0% (it’s on at zero, but the LEDs are off). Both can change in 1% increments.
- The R1 has a thicker back plate so I’d expect it to have more thermal capacity when running the light at high power. The cases are made from aluminum.
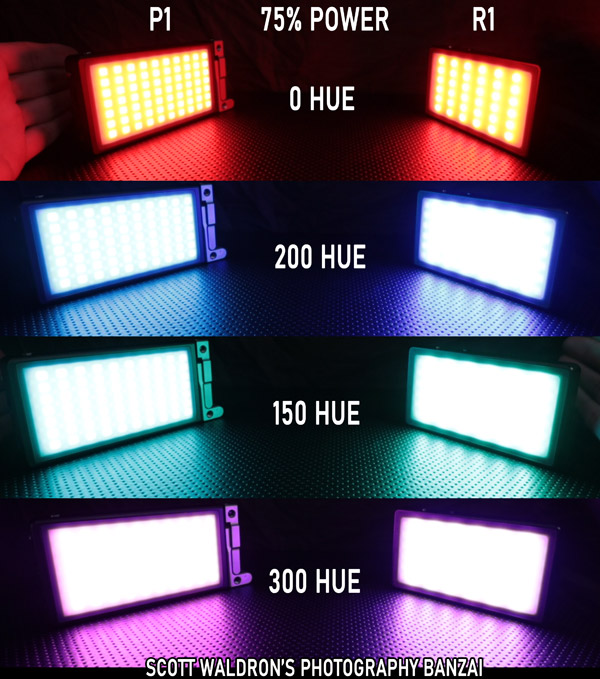
- The LED configuration looks completely different between the two. I can tell without any scientific testing that color of the light can be different between the two when they are set to the same values. For example, at 5200K the R1 has a warmer tone whereas the P1 has a cooler tone. The P1 is rated CRI:96,TLCI:97 and the R1 at CRI:97,TLCI:95. I’m not sure which one is technically better.
- Both lights don’t have a way to keep the light from shifting left and right when attached using the included cold shoe mount accessories. I’d like to see Andycine add a locking pin with a related cold shoe bracket to a revised R1. It’s not a big deal, but something to keep in mind. The R1 does tighten down and stay straight a lot better than the P1.
Power and charging of the R1
The R1 has a USB-C port for charging. This light does not come with an actual charger that attaches to wall power. For some reason it’s common practice these days. I even bought a charging kit for the DJI Osmo Action camera that came with a 3-unit battery charger, but no actual way to power the device. The camera itself also didn’t come with a charger.
In the case of the R1 it supports USB-C “power delivery” capable chargers, but I don’t have a charger that can work at that level.

I did try the light with various chargers from around half an amp to 2.1 amps. One unusual aspect to the R1 that I ran into is that if the charger is not capable of pushing some level of power, the R1 will do a burst of light around once every two seconds. I asked my contact to Andycine about it and he said that it’s normal. The intent is to notify the user that the charger being used isn’t capable of charging the light at a given speed. All of my chargers appeared to sent a few watts to the charger, but the small ones got the blinking thing.
When I used a 1.7 amp and a 2.1 amp charger with the light it didn’t do any type of flashing, which is good. With the 2.1 amp charger the light was pulling nearly 10 watts from the wall based on my “kill-a-watt” monitor.
You can run the light while it is being charged. Besides that feature, I completely charged the light and then ran it at 100% power for maybe 20 minutes. The battery indicator didn’t decrease. I think it’s likely that the battery will eventually decrease in that situation, but at the very least it will increase run time to have it connected. One thing is for sure is that the light gets really hot under that type of usage. Don’t quote me on this either way. I didn’t do enough testing. At least for my current use cases I wouldn’t use this for long periods of time, especially not at 100% output…
Overall thoughts on the R1.
Keep in mind that this light was sent to me for analysis. With that, I’m more focused on laying out facts rather than giving my opinion on it. Usually when I’m purchasing something I do research on what other options are out there. I haven’t looked around to see what comparable options exist. I’ll leave that up to you.
With lights like the R1 and P1, they have a specific goal in mind. You get a lot of options mixed into one compact portable light. Having a bi-color mode for matching the light to ambient or other lights being used is a benefit to photo and video work. Having RGB gives the user the ability to color a scene. RGB still feels like a somewhat new development in the constant lighting scene. It’s a fun option to have in a light. I have used the P1 to light numerous YouTube thumbnail photos, so by extension I’ll be using the R1 for that as well.
There are situations where I’d prefer having a light that runs directly off of wall power. I’m talking studio lights and others that are specifically designed to do that task. For other situations, I’d want a light with wireless control capability. Look at what you are trying to do and figure out if a light like the R1 can meet your needs.
Check out the light through my links:
Amazon: https://amzn.to/3h1WpNW
B&H: https://bhpho.to/38XGI7u
Or consider the Andycine Boling P1 (Video):
Amazon: https://amzn.to/2BSQp7G
B&H: https://bhpho.to/32V6cP9