The rear dial on my K-7 has been having issues for quite a while. Scrolling left especially didn’t work properly. The aperture would jump around randomly and even cause the camera to temporarily lock up. After my successful modification of the K-01, I was feeling confident enough to take the K-7 apart to see if I could do something about it. In the past I tried the old trick of getting some rubbing alcohol into the dial housing, but the weather resistant nature of the camera made that technique ineffective.
Lets get down to business.
Whenever disassembling a complex piece of electronics like a DSLR, be sure to sort your screws as you remove them. It’s also a good idea to take photos of the process and even a picture of each screw as it relates to a hole in the camera. That way you won’t end up putting the wrong screws into the wrong holes, or even worse end up with extra screws at the end!

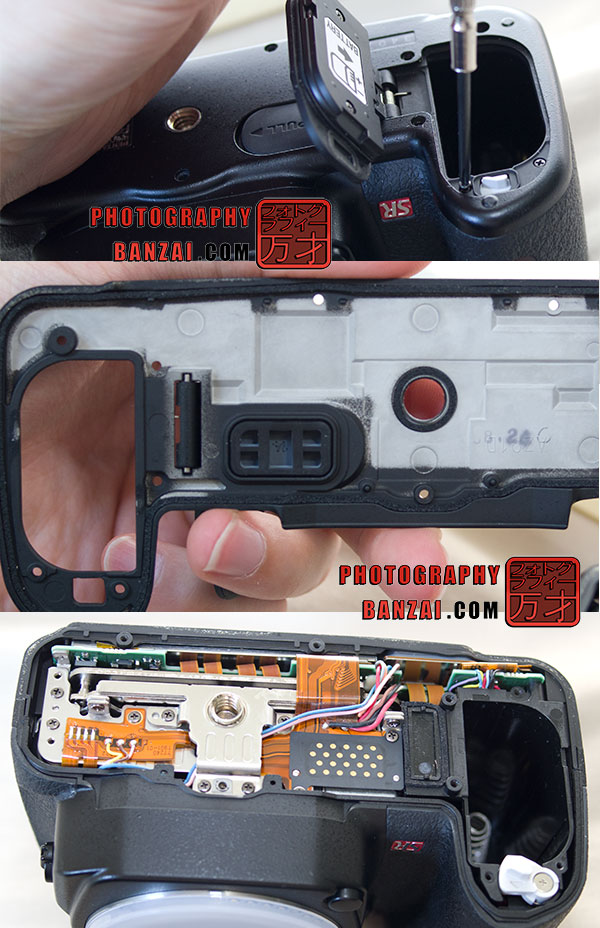
I always start with the bottom panel. It’s easy to remove and it helps me get a better idea of how the camera is put together. In the K-7’s case, it has 10 screws of varying sizes. I tried to arrange them so I would have an idea of how to put them back in afterward.
You can see the fully removed bottom panel in the photo above. It’s magnesium (alloy?) and very light weight. There is also some sealing foam that gets compressed when fitted to the bottom of the camera.

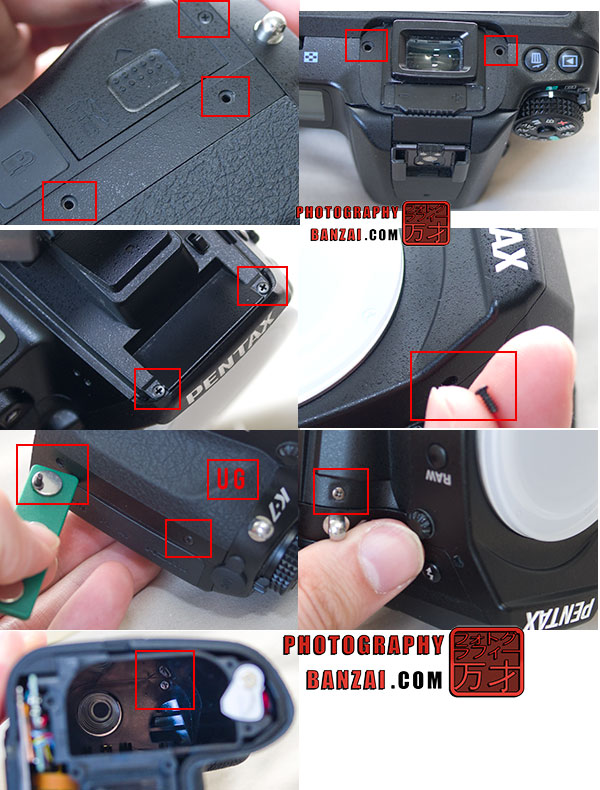
Removing the top panel is quite a bit more challenging. I started by taking off all of the side panel screws for good measure and then started searching around for other screws that related to getting that top panel off. From the photo above, you can see they hid one screw in the battery compartment as well as one under the left rubber grip. The grip material is held on with double sided tape, so it is easy to remove. Just try to keep your fingers and anything dirty away from the tape so you don’t have to go and search out something to replace it. All of the red boxes in the photo indicate screw locations. Take note I had to use a magnet to remove some of the screws from the casing.
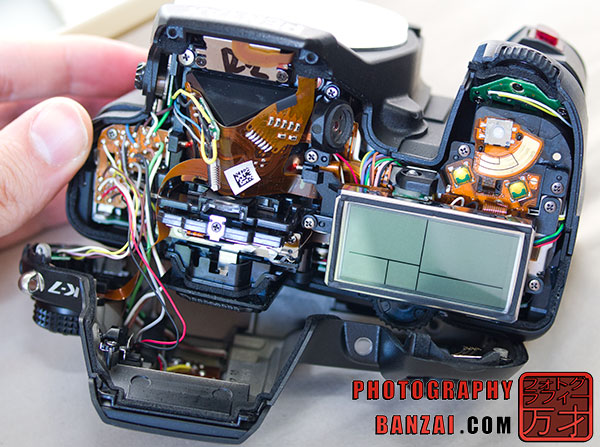
Here is a photo with the top off:

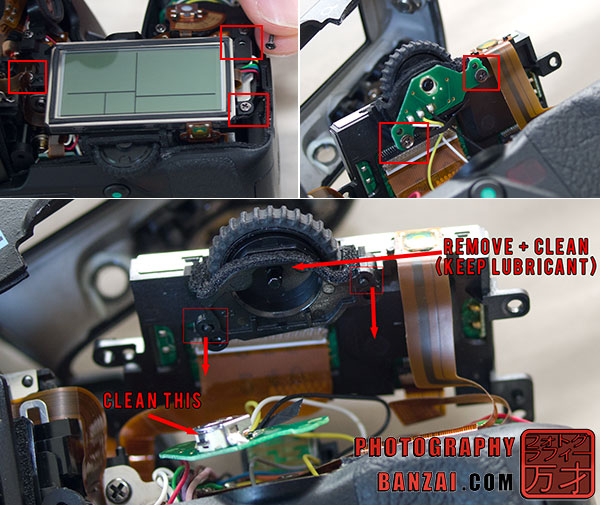
We have finally made it to the area where the rear scroll wheel is located. The top LCD panel has to be removed before we can get into the dial itself.

Once those 5 screws are removed, you are free to clean the dial. I disassembled the top dial and checked it out for damage. The bottom panel comes off with a little effort (the weather sealing is partly stuck to it). Inside there is a single ball-bearing that I made sure was positioned properly before reassembling. For the the dial electronics I put some simple sensor cleaning liquid on it and tried to spin the interior mechanism a few times to work anything out that might have been stuck.
The K-7 rear dial appears to be functioning properly now. The scroll action is smoother and the indicator for aperture doesn’t jump wildly like it had in the past. If it starts acting up again, I might see if I can order an actual replacement part and go through this process again. If that doesn’t work, I’ll know that the camera has more issues than just the dial. So far so good! It’s nice to have the K-7 back up and fully functional.
