
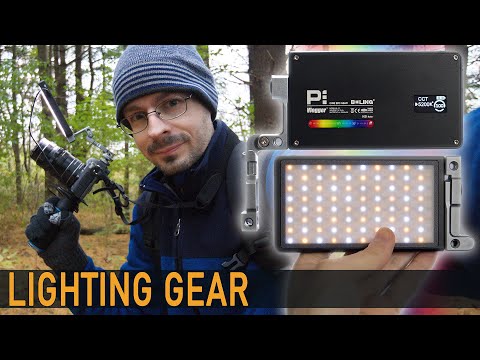
AndyCine sent this full RGB LED light with color temperature adjustment and 9 effects modes. I put the light through its paces in a mixture of use cases such as macro photography, vlogging, product photography, miniature scene and diorama timelapse/photo/video. I also tested out the light output compared to my Promaster and “Craphy” LED lights that are somewhat similar.
My contact sent me a 10% off code on the Boling P1 RGB bi-color light that works on the AndyCine Amazon store:
Discount Code: ScottRGB
Product link: https://amzn.to/2BSQp7G
I’m not sure when the code expires. The video hasn’t done well views wise, so they wanted to help out with the discount code!
Check current prices and other information here:
Amazon: https://amzn.to/2BSQp7G
B&H: https://bhpho.to/32V6cP9
Specifications:
- Model No: BL-P1
- Charging Power: 12W
- Charging interface: Type-C 5V/9V/12V Qc3.0 Intelligent charge
- Battery Capacity: 7.4V 2930 mAh
- Output selection: 0-100%
- RGB Color Gamut: 0-360 full color
- Color accuracy: CRI 96, TLCI 97
- CCT: 2500-8500k color temperature
- Intensity: 1480 lux at 0.5 meters
- Fastest charging time: 90 min
- Full power time: 140 min
- Lithium Ion Battery: 2930 mAh
- Button SET: Menu switch button
- FN: Multi-function button
- DIM: Dimmer button
- Weight: 260g
- Size: 150x70x15mm
Key features:
- A full range of RGB output along with color accurate bi-color.
- Compact size so it’s easy to bring along and not too noticeable.
- Solid build with a metal casing and mount.
- Versatile mount system that’s integrated into the light.
- A bright screen with exact values controlled by dials instead of buttons. Push buttons can be slow. Exact values are key to getting consistent results.
Details and what is included:
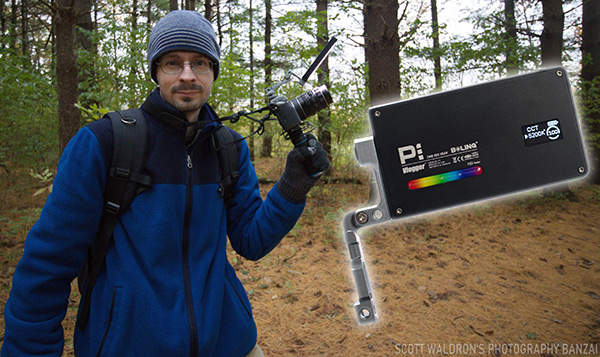
- Double jointed metal mounting bracket that has 7 screw threads and a lanyard loop. The light comes with a cold-shoe attachment. Both are very solid feeling with the device itself definitely having some weight to it.
- Control consists of an on/off button, a jog dial with a button to control mode plus sub-mode, and a dial for adjusting values.
- The light does remember modes and sub-modes, but I think it’s timer based between 5 to 10 seconds. There isn’t any way to force the light to instantly save a setting. You need to leave it set for a few seconds to make sure it stays on that setting for the next power cycle. There are hard stops on each end of the brightness control dial, so whatever that is set to the light will start up with.
- The light is rated 1480 lux at 0.5 meters. It has three modes: standard bi-color, RGB mode, and effects mode. The bi-color goes from 2500k to 8500k. That’s a large range! The RGB is a complete range with saturation control. There are 9 effects: lightning 1, lightning 2, TV screen glow, slow RGB loop, fast RGB loop, police car, ambulance, and fire truck. Some of these at maximum power are very intense.
- There is a USB-C port for charging. It comes with a USB-C cable, which is nice. It’s rated to use fast charging features of the USB-C specification. Normal chargers work just fine. I was only able to test with normal chargers.
- The light comes with a soft case. Inside the case there is a hex wrench for adjusting the tension of the double jointed mounting arm.
Notes in use:
- The first light sent to me didn’t survive being charged. I’ve seen some reports of people having duds as well. Make sure where you buy it from has a good exchange policy. My contact at AndyCine was very helpful with the process of getting me a second one.
- The power indicator changes a lot based on what you have the output set to. It was jumping from one to three bars toward the end of my excursion to a local state park for vlogging and macro photography. That said, I didn’t run out of power.
- I ran the (second) light for 20 minutes at full output and charged it at the same time. I’ve charged it multiple times so far. No issues with the second light. The light pulls around 12 watts consistently until it reaches capacity. For amps I see around 0.17, again, until it is reaching capacity.
- You can attach the hot-shoe accessory to the light while it’s packed in the soft case, but I don’t see a way to quickly add/remove it in that situation. In this case I attached the accessory to my camera cage instead because it was a lot faster to access that way.
- It’s definitely a hefty light. Full metal casing and bracket. Just keep in mind there is some weight, which can be good or bad depending on your situation. My scale measured at 1lb 5.6oz for M50 + 11-22mm + battery + card, 9.2oz for the light (612.35g vs. 272.15g).
- It has more of everything than the other two similar lights I have. Smaller in size, but more lighting options. Color adds a lot of possibilities.
- You will want to consider mounting options to keep the light from shifting in the connection joint. The included hot-shoe connector does have rubber at the connection points, but it loosens in use. I noticed that while doing macro work outdoors where the light was extended far away from the connection point on the camera’s hot-shoe.
Features I’d like to see or adjusted:
- I’d like to see some type of locking pin setup on the mount arm. With the included cold-shoe mount it can shift, especially considering the weight of the light. It worked okay when I had it extended from a camera hot-shoe, but it was shifting side to side occasionally. I needed to tighten the shoe connector a few times.
- No wireless control? Some lights have power control or even wireless charging now. (adding this potentially would make the light larger and add cost).
- Removable batteries would be nice. (that would require a larger device and make it less convenient in some ways due to added complexity).
Features I like:
- It’s a compact light with a large amount of output types from bi-color to full RGB and effects.
- Output seems good for what I’ve done so far from vlogging to macro and product photography.
- The exterior case and mount are very solid feeling. The mount itself is compact yet versatile.
- The back screen allows for exact settings. That makes consistent output possible. The light does save what the settings are automatically after around 10 seconds, so cycling power doesn’t require re-adjusting the light if you use a specific setting a lot.
I see this light as a solid all-rounder that can do a lot in a pretty small package. The overall design feels thoughtful and features like the mode and sub mode being automatically saved help in usability. I’m looking forward to using the light more.
Linked Video Transcription:
Today we're taking a look at this AndyCine Boling P1 light that I was sent

to check out. It has a lot of features. Full
RGB, bi-color, and some effects in it. I took

it out for vlogging, macro photography,
and also did some product

videography and photos, and a little
diorama thing. So all of that in this

video. Gonna look at this in detail. Let's
get started. It's a pretty compact

light. It has integrated mount with two
pivot points on it with seven mounting

locations for screws. So definitely a lot of
points to mount things on this light.

Also, full metal body and the mount
itself is metal as well.

Definitely solid and has some real heft
to it. Nice thing about this bracket is

that it it extends without any extra
stuff, so you got right from the hot shoe

all the way... Now, it is pretty heavy. It's
probably not a great idea to have it

running on there. But general flash are
about that weight. It's just there's

definitely some weight outside of it.
Buttons wise on/off button, a set button

to switch between the three different
modes. You've got the bi-color. You have

the full RGB, and also the effects.
So with that set button you press that

and it cycles through. You also have a
jog wheel on there. That is a button

itself. You can change the settings with
that. And one standard analog dial for

adjusting the power level of whatever
mode you're in. Another nice thing is you

can leave the light on and turn it down
to zero power just as I'm kind of

going.. walking around. And I don't have to
keep messing with the on/off switch. The

back screen shows you exactly what power
level you're at. Also what mode and sub

mode you're in. So if you're in standard
bi-color it'll give you the color

temperature plus the percentage of power.
When you switch to the RGB mode you have

one for color and one for saturation, and
also of course the value for brightness.

On the back there is a scale to show you
what value to pick for what color you

want. I compared the P1 to two different
lights that I have that are similar. One

is the Promaster, I have an old video and
that one. Doesn't have bi-color, you just

get that white light from it. Also, I have
another one that has removable batteries.

That one is actually bi-color. It's a
little bit bigger. More diffusion on it.

What I noticed while looking at the three.

Output seems generally similar. I really
can't tell if it's got a lot more power

than the other ones. With color
temperature I set the camera to whatever

I was trying to output with the three
different lights. With the Promaster it

was given a green cast to it. The CRI
rating is 75 or something like that. With

the 95 rated P1 I was getting a little
bit of a magenta, but it was definitely

more true. The P1 has a lot more fine
control on the light output. You've got

one percent to a hundred percent, and at
one percent.. two percent.. five percent.. You

definitely get a lot less light, which is
nice. In some situations where you don't

need a huge bright light, it's nice to
have. Of course, with the back screen

shows a actual number value. If you were
to want a certain value you can record

that and go back to it. So with the Promaster it doesn't do that. It's just got

an analog value. And you could leave it on
that, but you won't be able to reproduce

your lighting exactly. Because it doesn't
have a number value the P1 does appear

to save the values for what you were
running. I think there's a timer involved.

But it does save it. It seems to be
consistent if you leave it on for about

10 seconds. There is a USB-C port for
charging. It does support the fast

charging apparently, but I don't
personally have any of those fast

chargers. However I did try it out on
quite a few different chargers and they

got similar results. It pulls around 12
watts and also about 0.17 amps from

what I could tell with my device that
measures that. AndyCine did send me a

unit that did not survive its first
charge, but they sent me a second one.

And the second one appears to be just fine. I
did have it set to a hundred percent

power running as well as charging it at
the same time and it did do the standard

around 12 watts pulling for that
situation. The light comes with a soft

case that has loops for a belt. That
worked nicely.

It also comes with a small mount for
cold-shoes hot-shoes. Now, it does

shift a little bit here and there.
Especially when I was doing the macro

photography, but it's decent. It has some
rubber on it that helps that situation a

little bit. So I pop it on and you got
light right where you need it. You can

adjust it up and down.
That works very nicely. The

macro photography is the best use case
I've found so far with this light. If

you're using a cage it'll be even better,
but with this setup and no cage. Just as a

camera plus the light...
get that nice extension.

So I was using the Super Takumar 50
millimeter F/1.4 with the adapter

from M42 to EF-M mount. And then I had two EF-M extension tubes. With the tubes, the

lens, the adapter it had a perfect amount of
extension for that setup with the light.

With macro photography the main thing
you want to do is try to use smaller

apertures so get more in focus and with
a light like this that is positioned

properly... that really really helps.
Because it definitely gave me some

options for getting light right and the
subject in those macro situations.

I could adjust the light up and down to
get even better angles for that.

I could rotate it. It worked very nicely!
Also, I tried some standard product

videography, photography. Trying to do a
zoom in with these lenses. And I think

that would work nicely for the setup of
a video about a certain product. Anything

like that could work out. Also, just
standard product photos. Adding a splash

of color in the background or other
situations. Of course when you're trying

to do that you're going to want two
different lights instead of just a

single light. I did use a little bit of
fill with a piece of cardboard for this

setup. But in general if you want to have
some color you're gonna want two lights.

I can see using this light for my hands-on
videos at the local camera shop. Gonna

try it out at some point, but in general
it would definitely work just fine for

that setup. With the vlogging it worked
out nicely. It definitely adds a decent

amount of fill. At least give your face
some light, and in that setup it works out.

Let's turn this off. Yeah! That's a
big difference...

Turn this on.
I understand the vlogger-ness. See how

bright it gets. Oh yeah, it's not bad, not
bad...

Of course, if you're using glasses like I
do you might get some reflections in

the glasses. It's just.. depending on how you
set up the light. How you adjust it, but

in this case it has a pretty versatile
mount system. So you could potentially

adjust things to not have it reflect in
your glasses. When I did go to the state

park it was very dreary and definitely a
good situation for lights like this that

had a decent amount of fill when it's
not super bright out. I didn't have any

issues with the output of this specific
light. One thing to keep in mind with

vlogging as this light is not
lightweight. It definitely add some

heft to your setup. I did measure out the
M50 with the 11 to 22 millimeter lens, a

battery, and a memory card verses this
light itself. Think I gotta go two hands for

this. It gets pretty heavy! I didn't have the
light fully charged before going on the

outing to the local state park, but it
did last the entire time. I've been using

the light quite a bit and it is got one bar
down so far. What you can do is bring

some type of battery with you. In this
case we've got the Power Grip from Vivitar.

THE POWER GRIP

It is a grip and
that is convenient.

With some type of a

battery plus the light itself integrated
with the camera that could be a very

nice setup. In a studio setting I tried
to do a few different things. I had some

Legos set up. Had a little diorama. So I
was trying out the effects modes. If you

are sensitive to flashing light, keep
that mind. With this video we're gonna

show you those modes. So with the Legos I
was doing those effects modes mostly. And

I did set it to the standard power at one
point, but I also tried a time-lapse and

one of the effects modes. Didn't really
turn out how I was expecting, but I can

see that as a fun option with just
having the light running continuously

and adjusting things. There are nine
different effects.

Lighting 1, lightning 2

TV screen glow, and also the RGB loops.

as well as the police, ambulance, and fire
truck.

Here is the Boling at 1% power...

Let's bumped up a little bit before we do
anything else. Some of the features that

I might change or adjust in a future revision of the light... So with the end

of the mounting setup, it would be nice
if it were a little bit longer and it

had some type of pin. Where with the
proper adapter it wouldn't shift. I have

noticed that some other lights that
have recently been released do have

wireless control, like full wireless
control, or wireless charging so those

are other options. Let's go over the
features that I really do like about the

light. First off, because is it is full RGB with
bi-color and effects that just gives you

a lot of functionality light wise in one
device .It is definitely bright enough

for a lot of situations. I didn't have
any issues with amount of power output

for the light with what I was doing as I
mentioned before with macro photography,

product photography, I'm definitely gonna
be using this light more. The general

build quality of the light is very solid.
You've got the metal casing and the

metal bracket system. Having a back screen
on there with exact values is very

useful to be consistent with your photo
and video stuff. You know you can really

dial down and remember those exact
settings. And as I mentioned. I think on a

timer it does save those settings. So if
you turn the power off and on it will go

back to that as long as you let it run
for a little bit. That was a look at the

AndyCine Boling P1 vlogger video light.
Definitely very versatile, solid

construction on it. As I mentioned the
first unit that they sent did not

survive the first charge, But this one
definitely seems very functional.

No issues with it.
Scott From Photography Banzai, thanks!

Charge it.. once I...

A good thing you can

do is bring some type ahhh...

It is very colorful!

What you're trying to do, but. Let's redo
that.