
Light can be a challenging medium to capture effectively. When I say available light, I mean all forms of light that do not come from camera flash or any additional lighting devices. That could mean either sunlight or artificial lighting depending on where an image is being taken. A large percentage of photography I do is using available light because I prefer this method for the sake of simplicity.
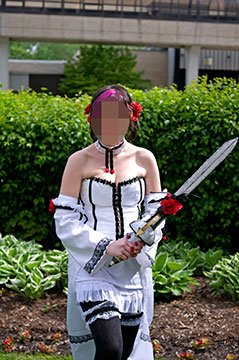
The main tool of the job here is good light. Find areas outside or inside where it is bright, yet not so bright that your subject has difficulty giving you a nice facial expression due to being utterly blinded. Overcast days with some cloud cover can be one of the best times to take photos when only considering exposure uniformity.
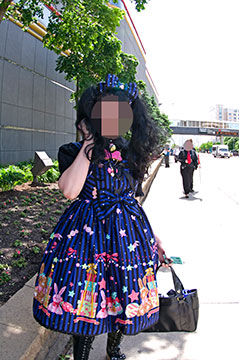
As said before, watch out for strong contrast from light beams because that will blow out highlights in part of your subject’s body, this would mean to stay away from large structures outside unless they completely cover the scene. If the structure only covers some of the scene, chances are the rest of the photo will be almost completely white as the camera will be unable to have enough dynamic range to properly expose both the person in the shade and the ground or background out in the sun. The sun at noon will be more challenging than at 4 P.M., but anytime should be manageable and produce results when care is given.
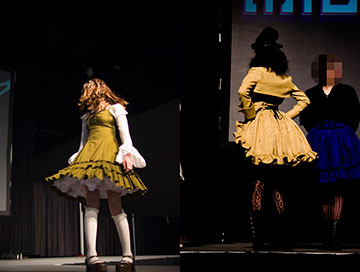
When photographing indoors, things become more difficult. Hotel lighting isn’t always the best. Look for areas of the hotel that let in light from the sun when it is daytime, otherwise, try to spend most of your time in the most well lit rooms and hallways the place offers. Also, look for the largest rooms as the lighting will most likely be a bit more omni-directional. Avoid having wall and lamp lighting in the background of your frame as that will probably be blown when the camera tries to properly expose your subject. Don’t shoot in the direction of windows or doors because those too will turn into bright white objects, not to mention your subject will be back-lit (back-lighting done intentionally can be nice).
It’s surprising how indoor structures with no windows are still flooded with natural light from connecting rooms. It makes a noticeable difference in the ease of taking an indoor shot when it is still daytime. Once it is dark outside, indoor lighting is not supplemented and all bets are off when taking available light photos. Having powerful equipment can help. For example, my current APS-C camera body’s imaging sensor is one of the strongest currently available in dynamic range, meaning it can record detail in extremely dark or light situations. It is also strong in high ISO capture with a range of 80-51200, with 3200 and 6400 being completely usable after some noise reduction in post-processing.
With such a strong camera body I can take images in dark situations and still be able to avoid blurring as I can bump up the ISO enough to compensate. Lenses are also important in low-light photography. Using a lens with a maximum aperture of f1.4 will provide you a lot more flexibility in this situation than a kit lens that starts at f4. The negative, or positive depending on how you look at it with aperture, is that the wider you go, the less depth of field you will have. Just keep that in mind if you want to use available light in dark situations and are photographing a group of people.
- Overview
- Who is this for?
- What is convention photography?
- My experience and experiences
- Why be a part of this?
- Practice, practice, practice!
- Networking
- Fun
- Photography terms primer.
- Equipment
- It is important or not depending on your ideals
- A basic setup.
- Decide how you want to make it work.
- Framing and composition
- Full body shots.
- Portrait style.
- Skewed angles.
- Face in detail.
- Plane of focus.
- Rule of thirds and golden ratio
- Available light photography.
- Strobe photography.
- Removing harsh light.
- Flash brackets.
- Bokeh and blur maximization.
- Histogram reading and image review.
- Post processing.
- Various schools of thought.
- Available software on your OS of choice.
- Ideas on how to improve your processing.
- Business cards.
- Social networking.
- Website
- The process from start to finish.
- My equipment.
- Ask the person first.
- Interrupting people.
- Constrained areas.
- Physical activity.
- Summary